Highway Collapse V1
This sample game is designed for the 2026 UNSW Coding Challenge Coding category.
It is suitable for upper primary students and secondary students.
The purpose of this activity is to help students understand how to use Google Teachable Machine. Students will create and train their own pose model, upload the trained model, connect it to their game code, and use it to control one sprite or object in their game.
The game is based on this year’s theme: Highway Collapse.
Sample Code Download
Download the sample Scratch project before you start.
1. Open the Coding Studio
Go to the Coding Portal:
https://elearning.mrtrobotics.com/coding-portal/
Because this project uses artificial intelligence, you should work in MRT AI Studio, not regular Scratch.

Click MRT AI Studio in the bottom corner to enter the studio.
2. Prepare the Sprites and Backdrop
This activity is made for students who have already completed the basic Scratch courses or already understand basic Scratch coding.
If you are new to Scratch or block coding, please complete the basic Scratch courses first.
Create the following items, as shown in the picture:
- 4 sprites
- 1 backdrop
3. Create the Road Sprite
Create the road sprite with 3 costumes.
First, draw the first road costume. Then copy it and paste it into costume 2.
In costume 2, move the centre road lines slightly lower than in costume 1.
Next, copy costume 2 and paste it into costume 3.
In costume 3, move the centre road lines slightly lower again.
When the costumes change quickly, it will look like the road is moving and the car is driving forward.
4. Create the Car and Rocks
Create or choose your own car sprite.
Create or choose your own rock sprite.
You may draw them yourself or select suitable sprites from the sprite library.
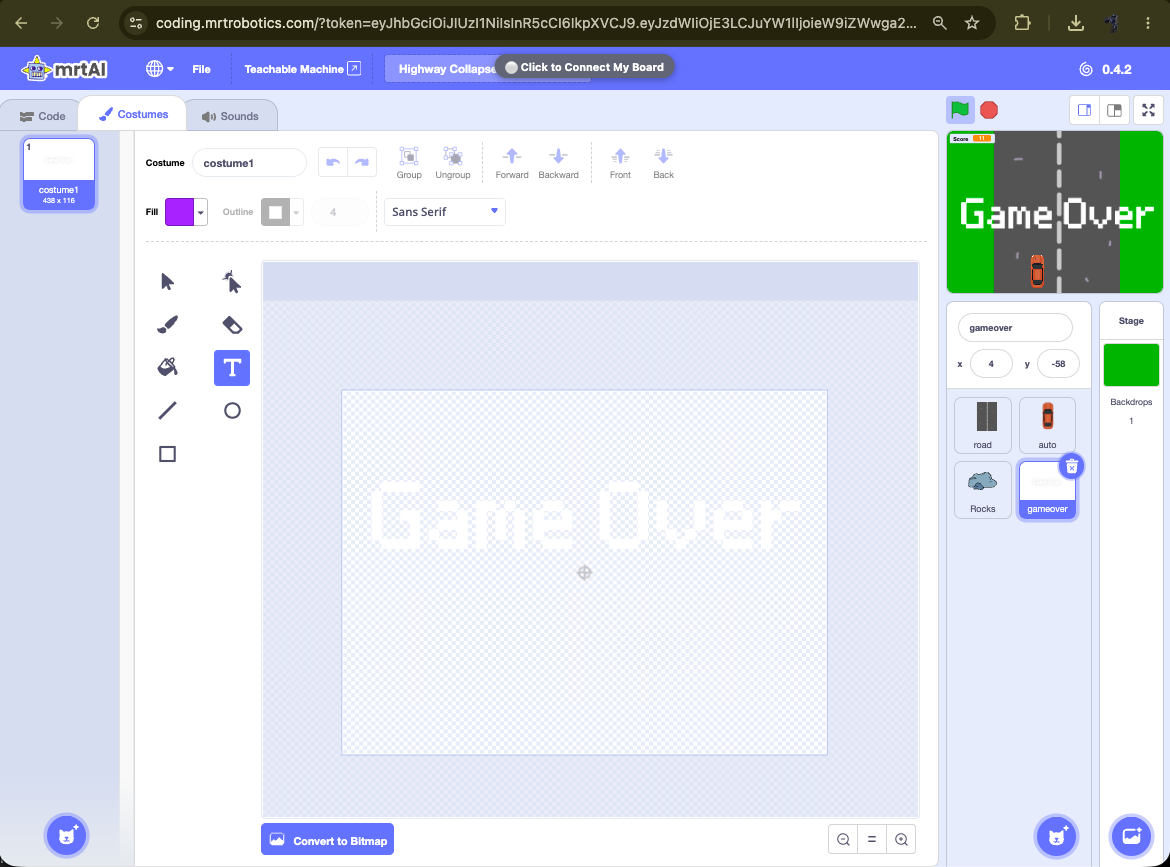
5. Create the Game Over Sprite
Create the gameover sprite using the text tool.
Type Game Over.
You can make the text larger by changing its size.
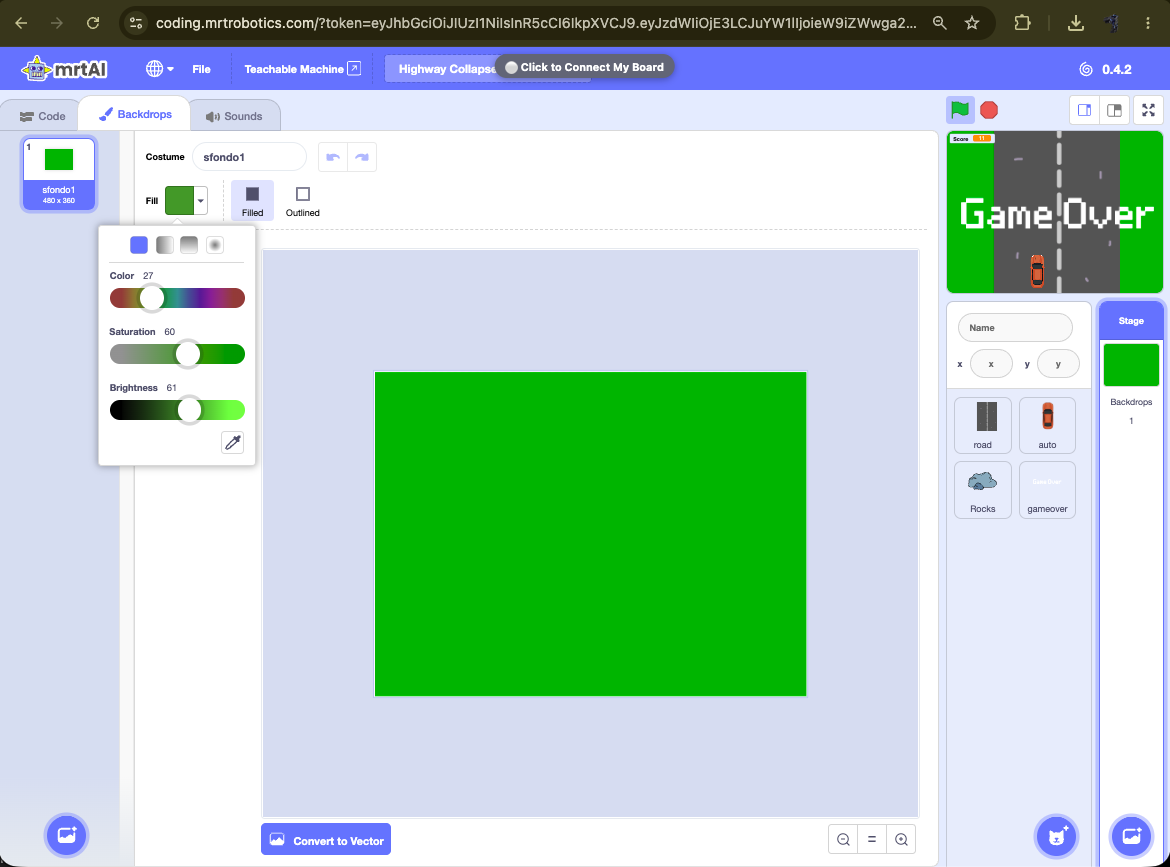
6. Create the Backdrop
Select the rectangle tool.
Choose a colour you like.
Draw a large rectangle to fill the whole backdrop.
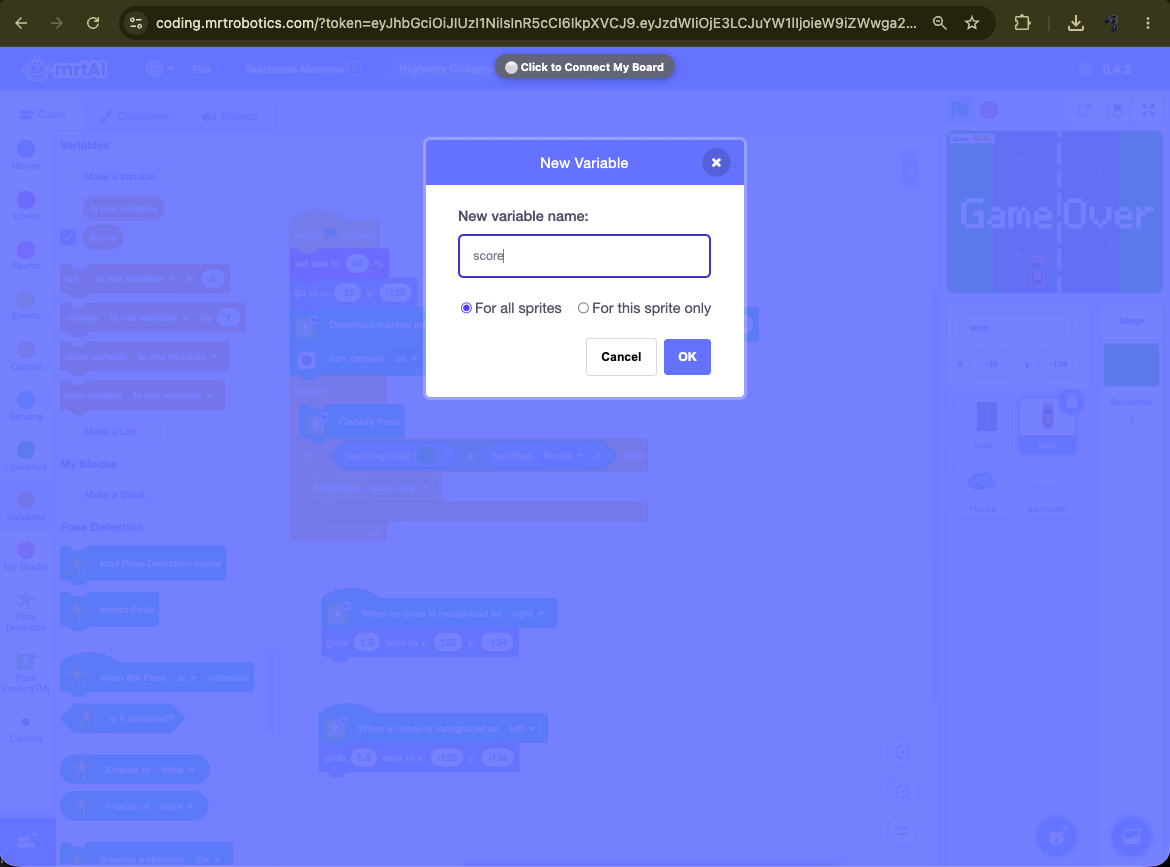
7. Create the Score Variable
Create a variable called Score.
This variable will keep track of the player’s score during the game.
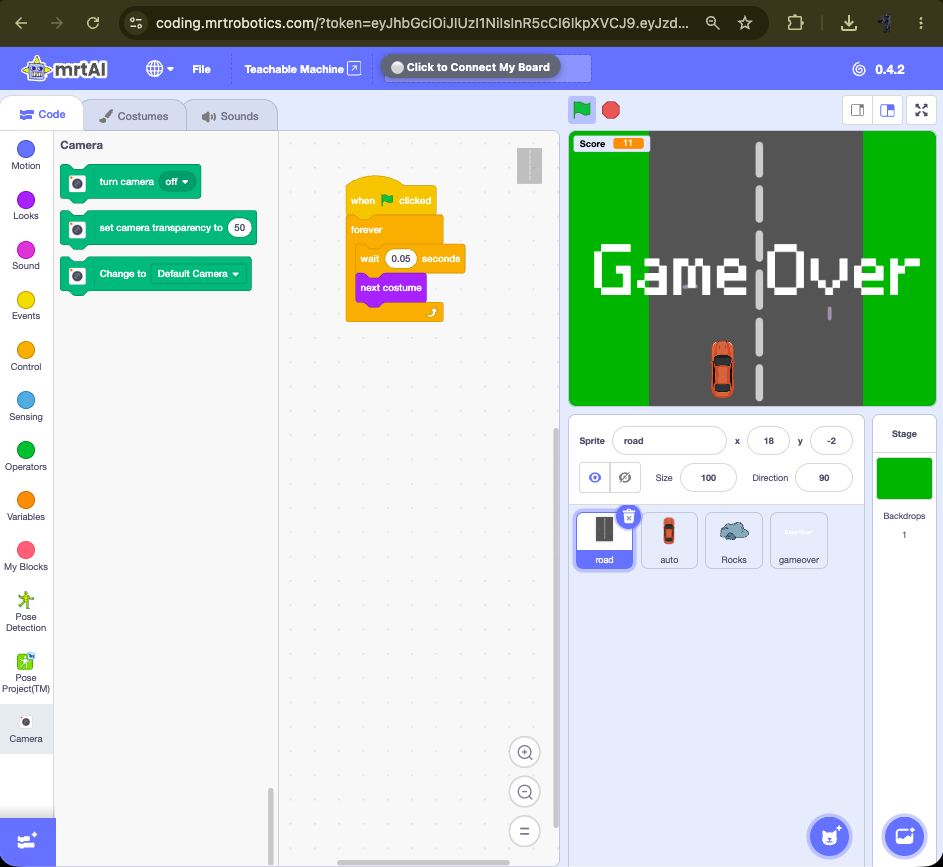
8. Road Code
Add this code to the road sprite.
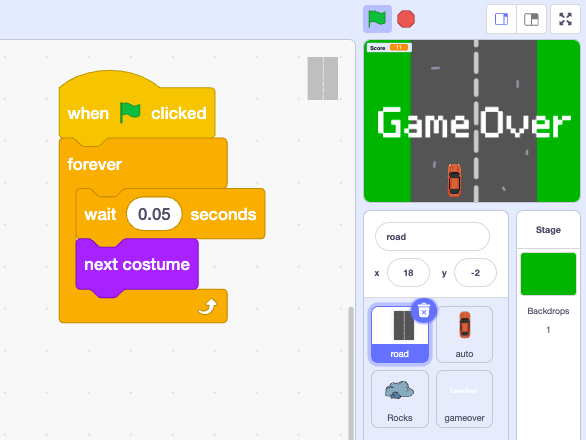
The road is not actually moving by changing its position.
Instead, the road sprite keeps changing costumes quickly. This creates an animation effect, so it looks like the road is moving.
9. Rocks Code
Add this code to the Rocks sprite.
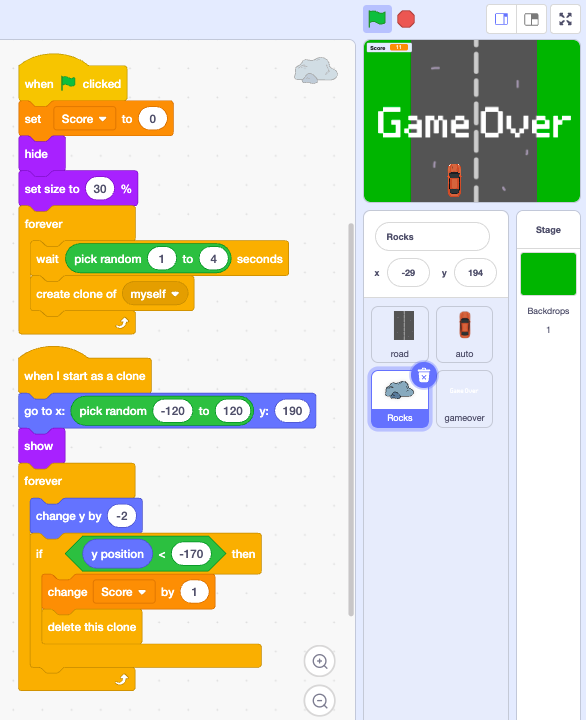
The original rock sprite is hidden.
Every few seconds, it creates a new clone of itself.
Each rock appears at the top of the screen in a random position. Then the rock falls down.
If the player avoids the rock until it reaches the bottom of the screen, the score increases by 1.
10. Game Over Code
Add this code to the gameover sprite.
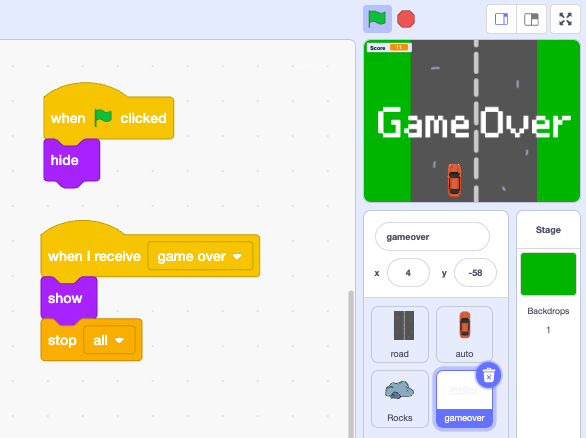
At the start of the game, the Game Over message is hidden.
When the player crashes or loses, another sprite sends the message game over.
Then the Game Over message appears, and the whole game stops.
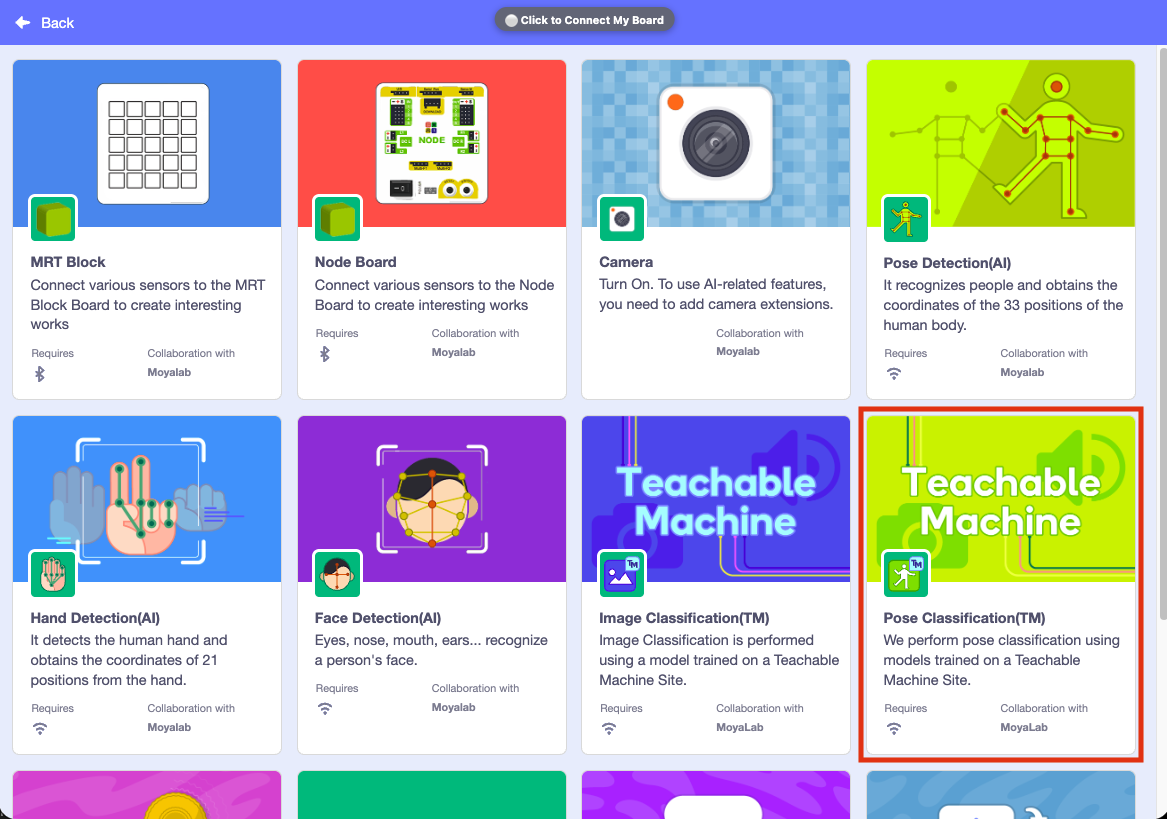
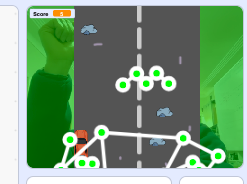
11. Auto Code – The Main Part of This Lesson
This is the most important part of the lesson.
First, click the Add Extension button.
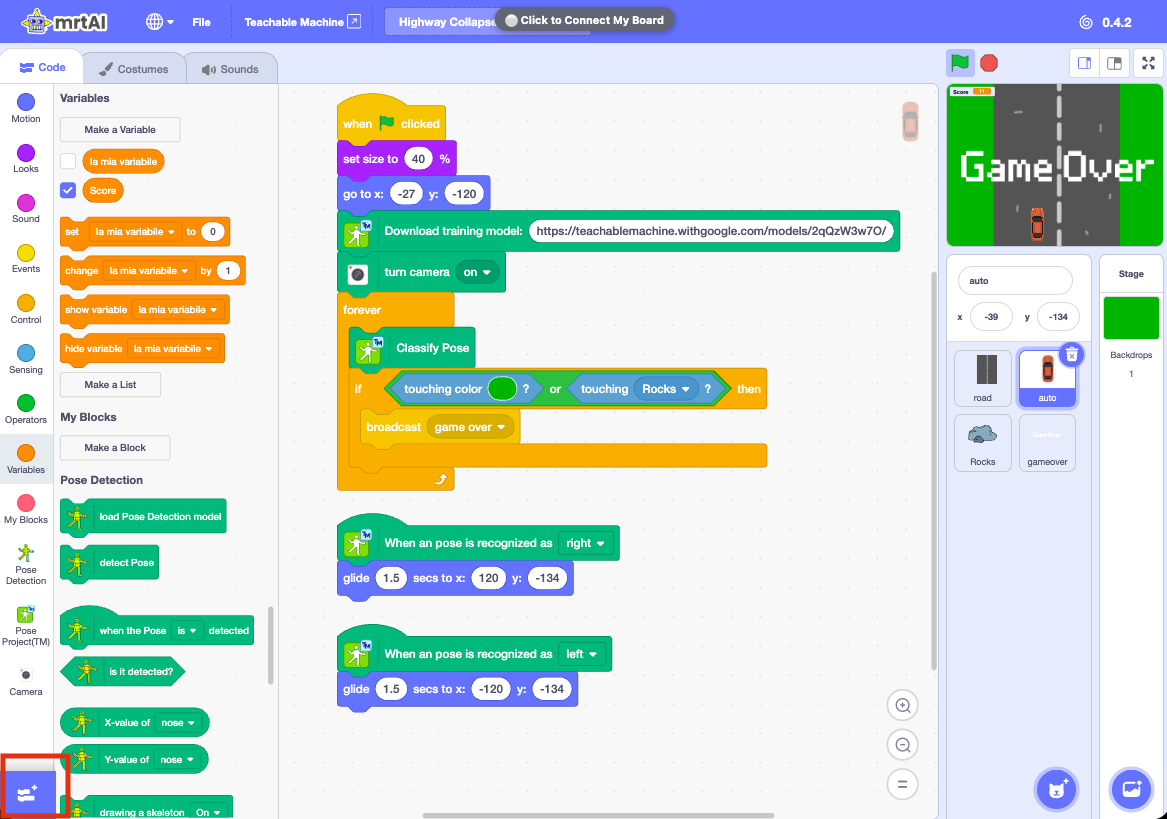
Select Pose Classification.
Now create the code shown below.
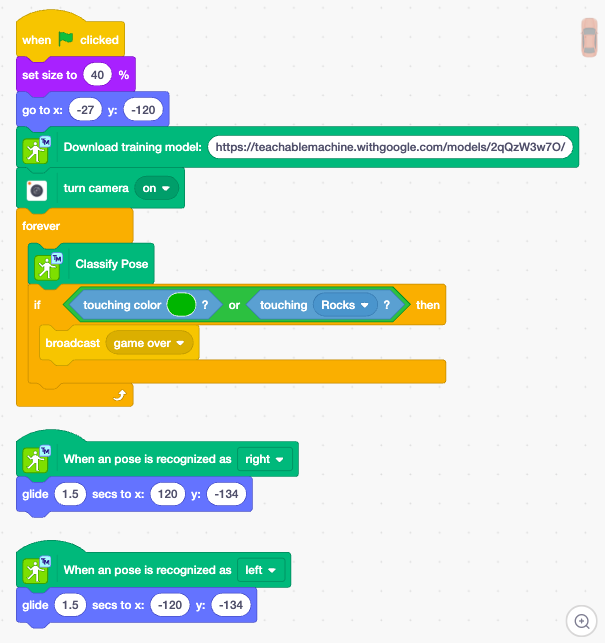
Important Notes
A. Use your own trained pose model link.
You must use the link from the pose model that you trained in Google Teachable Machine.
B. Click “Download Trained Model” first.
After you click it, your trained model will be downloaded and connected.

C. Select your own pose classes.
After the model is loaded, the classes from your pose model, such as right and left, will become available to select.
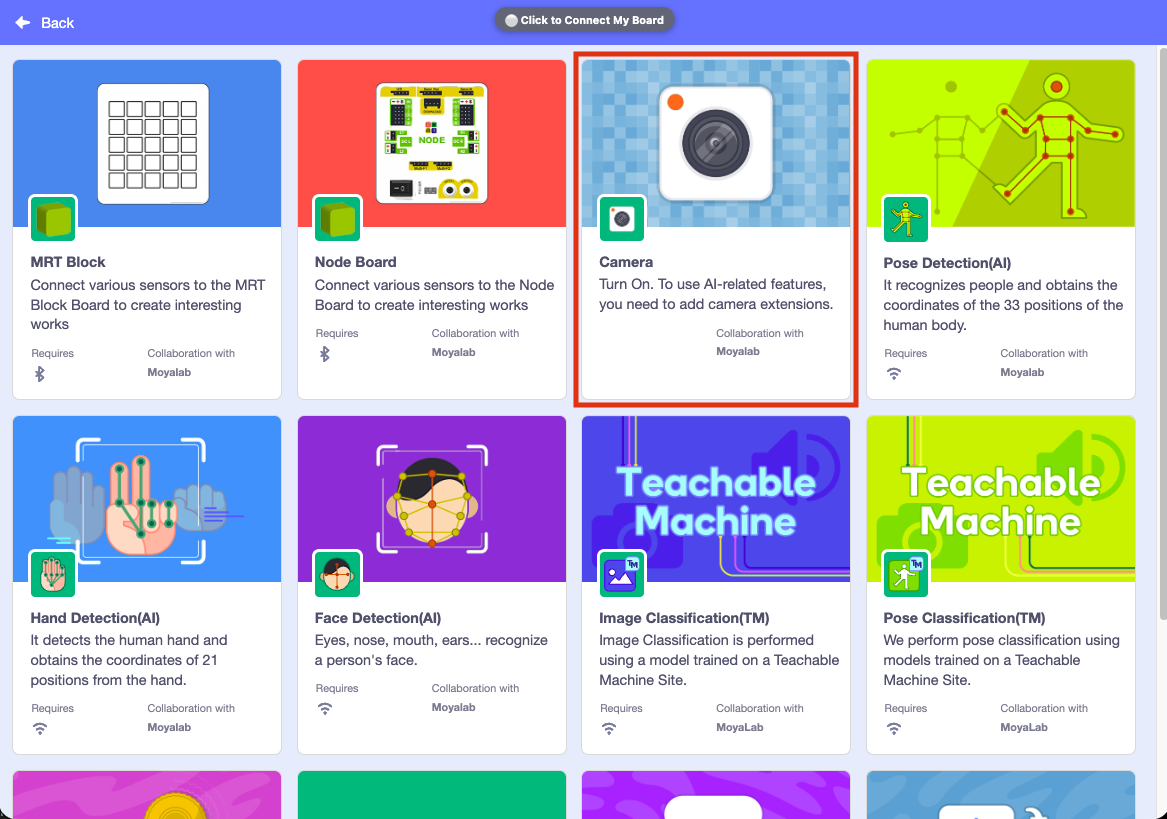
D. Choose the camera from the extension.
Make sure the camera is selected in the Pose Classification extension.
Now you are ready.
Stand or sit so that your upper body can be clearly seen by the camera.
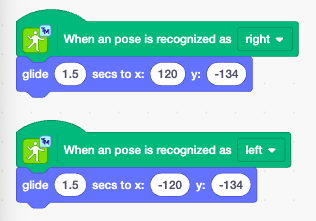
When you raise your left hand, the car moves to the left.
When you raise your right hand, the car moves to the right.
Move the car and avoid the rocks falling onto the road.
Now it is your turn.
Use your creativity, build your own pose model, create your own game, and try to win an award!
Sample Code Download
Download the sample Scratch project before you start.