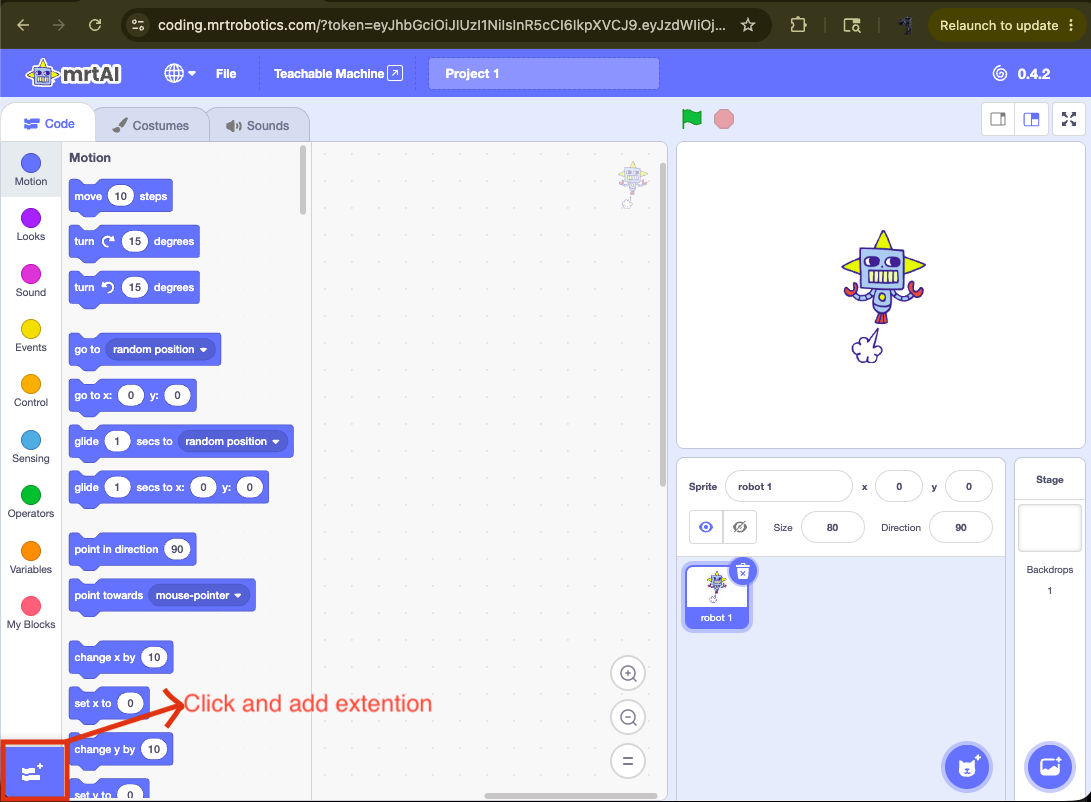
1.
Click and add the extension.
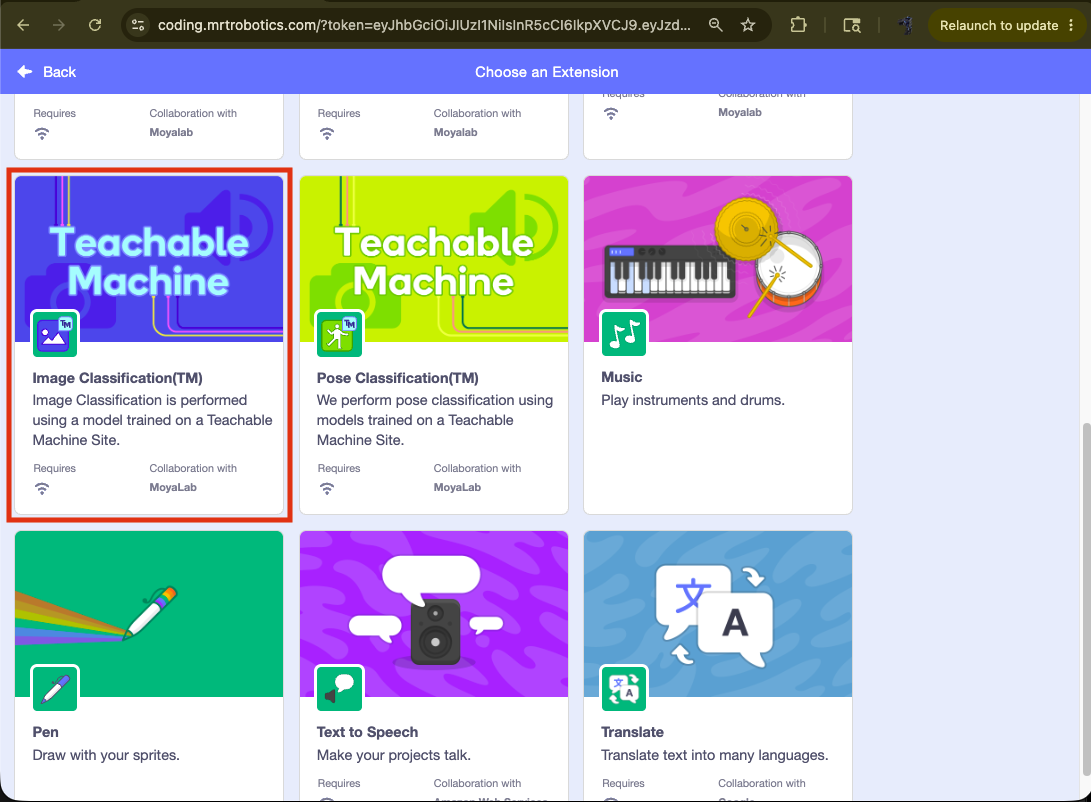
2.
Add the Teachable Machine extension.
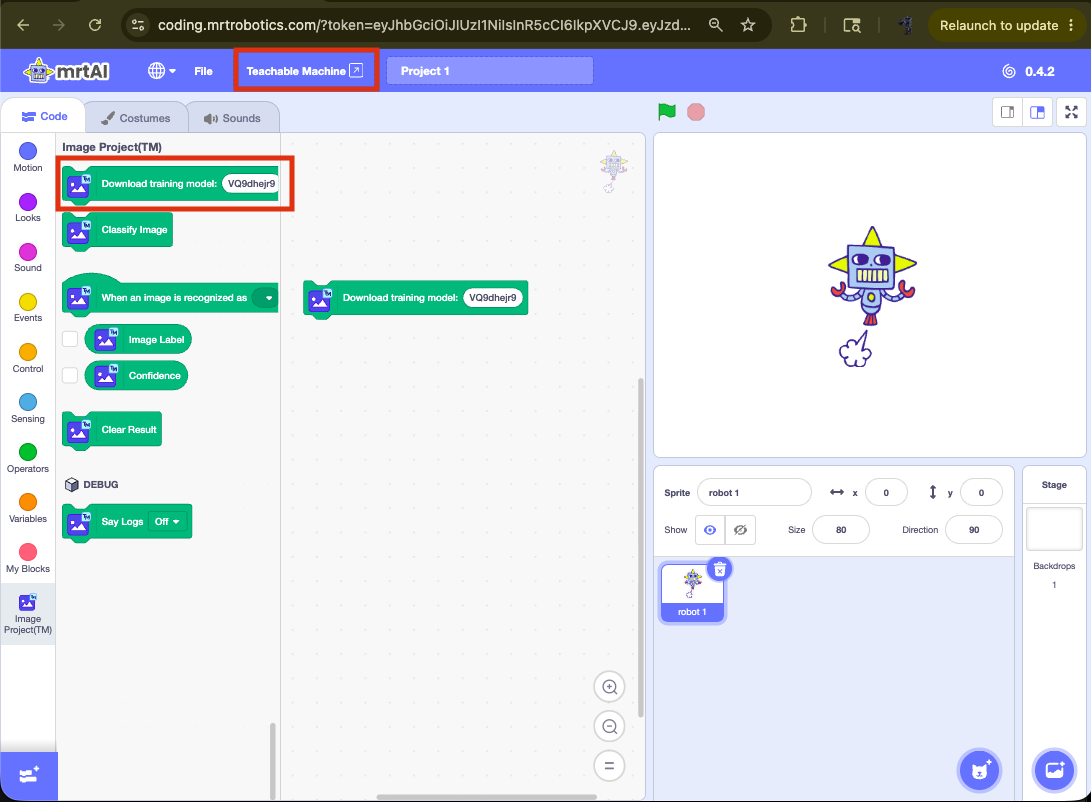
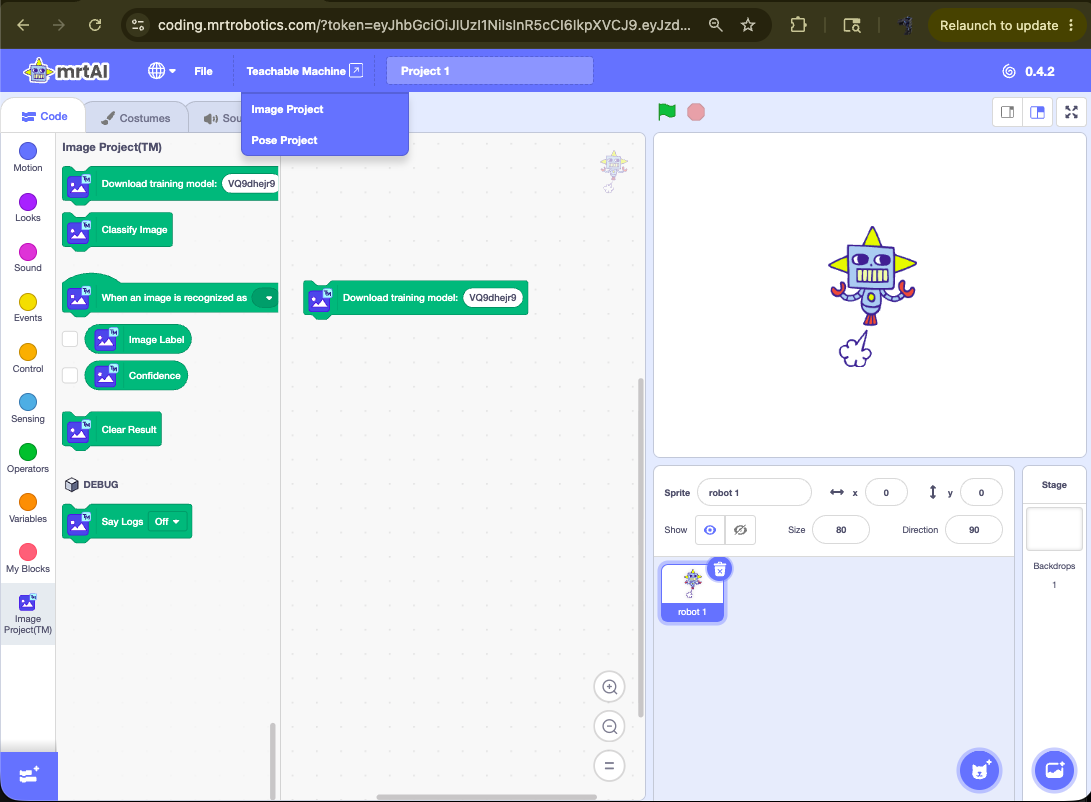
3.
First, take out the block that allows you to connect a trained model.
Then click the Teachable Machine button, create your own machine learning model, train it, upload it to the Google server, copy the web URL of your model, and paste it into this block.
4.
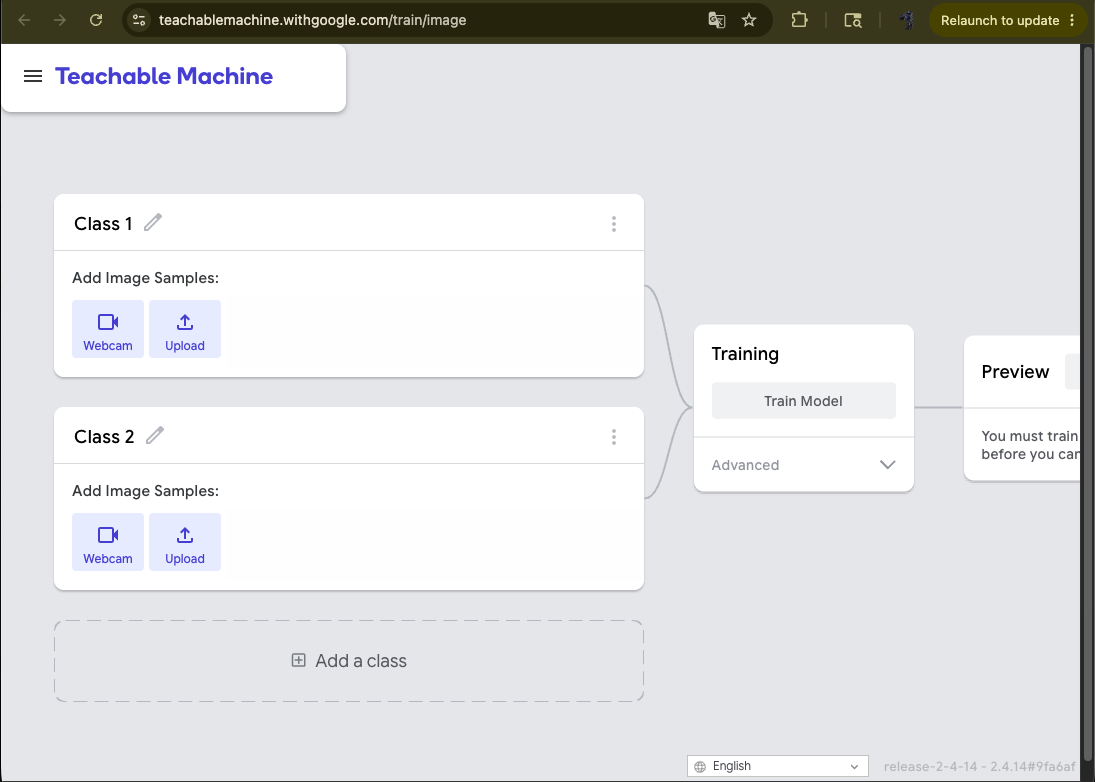
First, practise with an image project.
5.
Create three classes: Rock, Paper, and Scissors.
Record images directly using the video camera and create your own model.
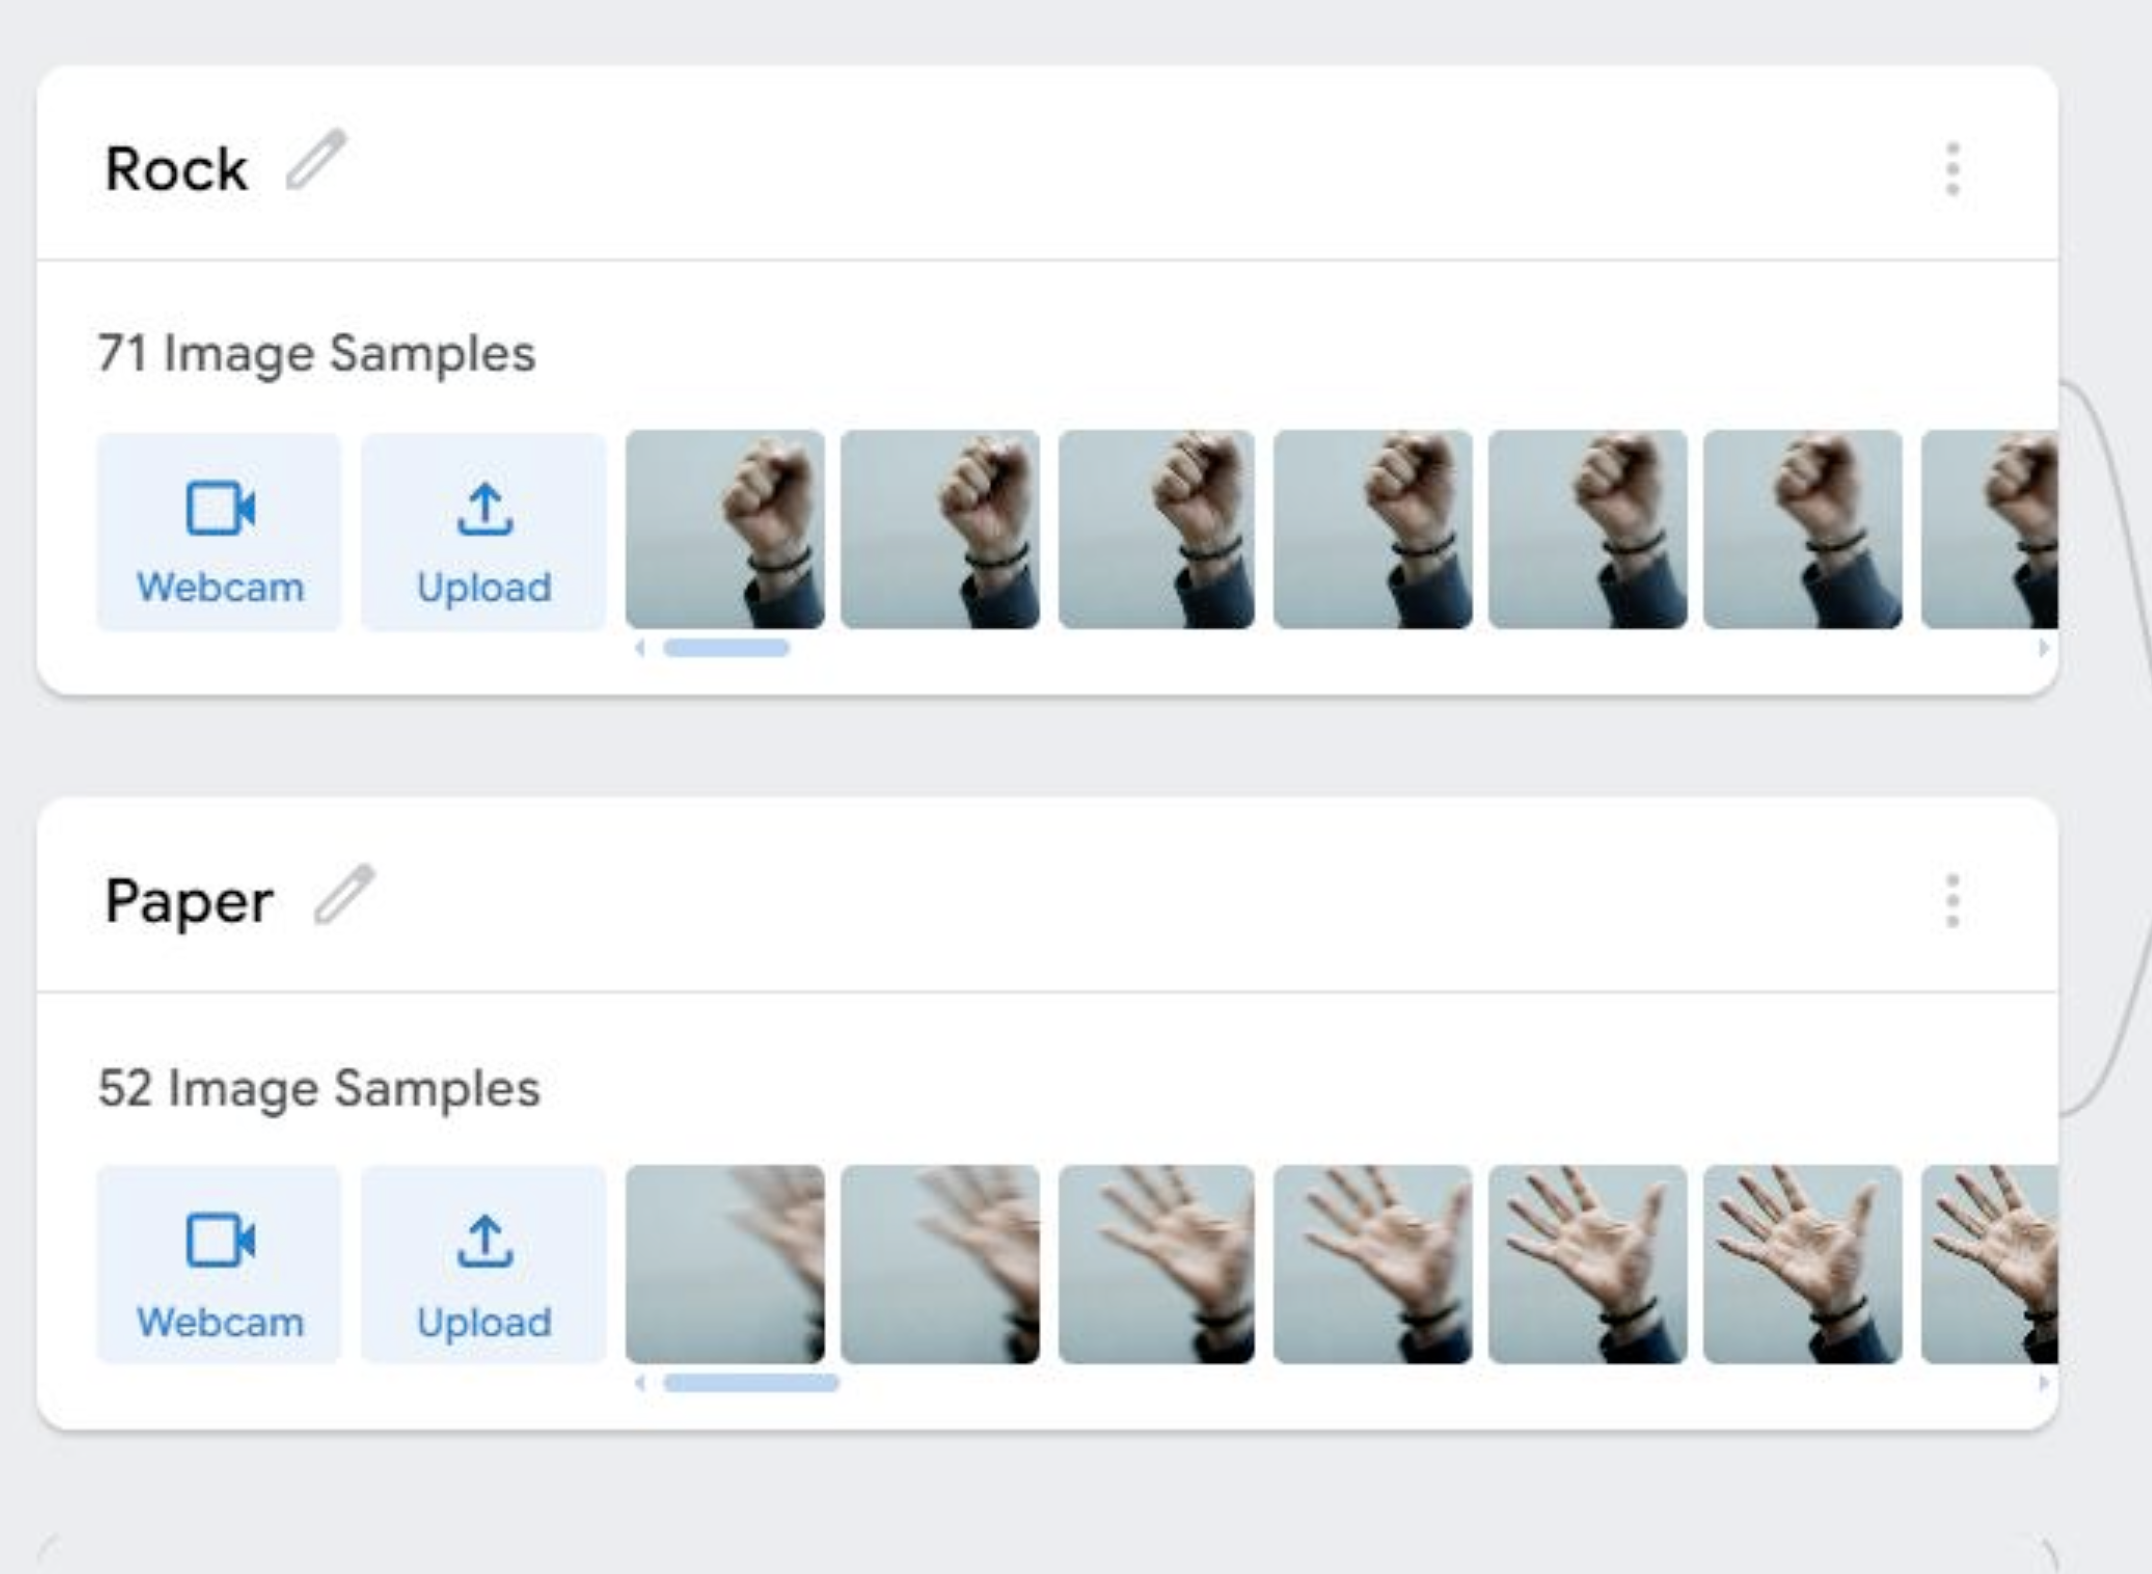
6.
Make sure the images are clear and accurate.
Use a simple background and good lighting, and take images from different angles.
7.
Once you have collected enough images, click the Train button to train the model.
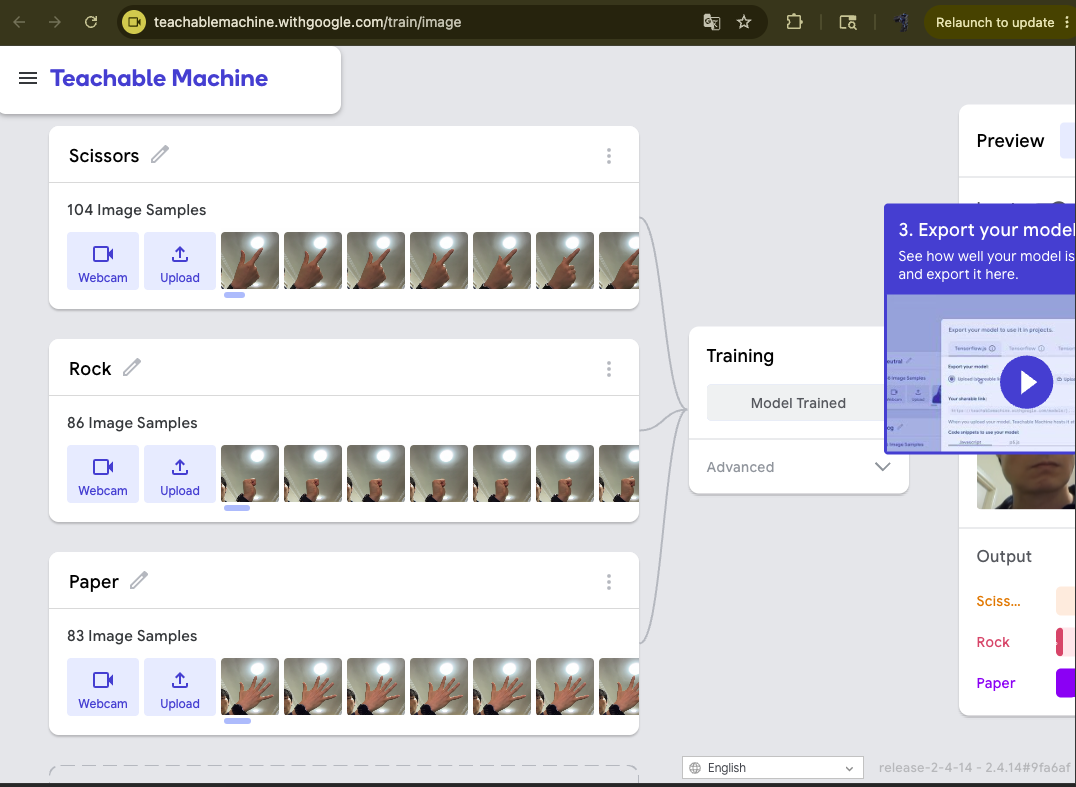
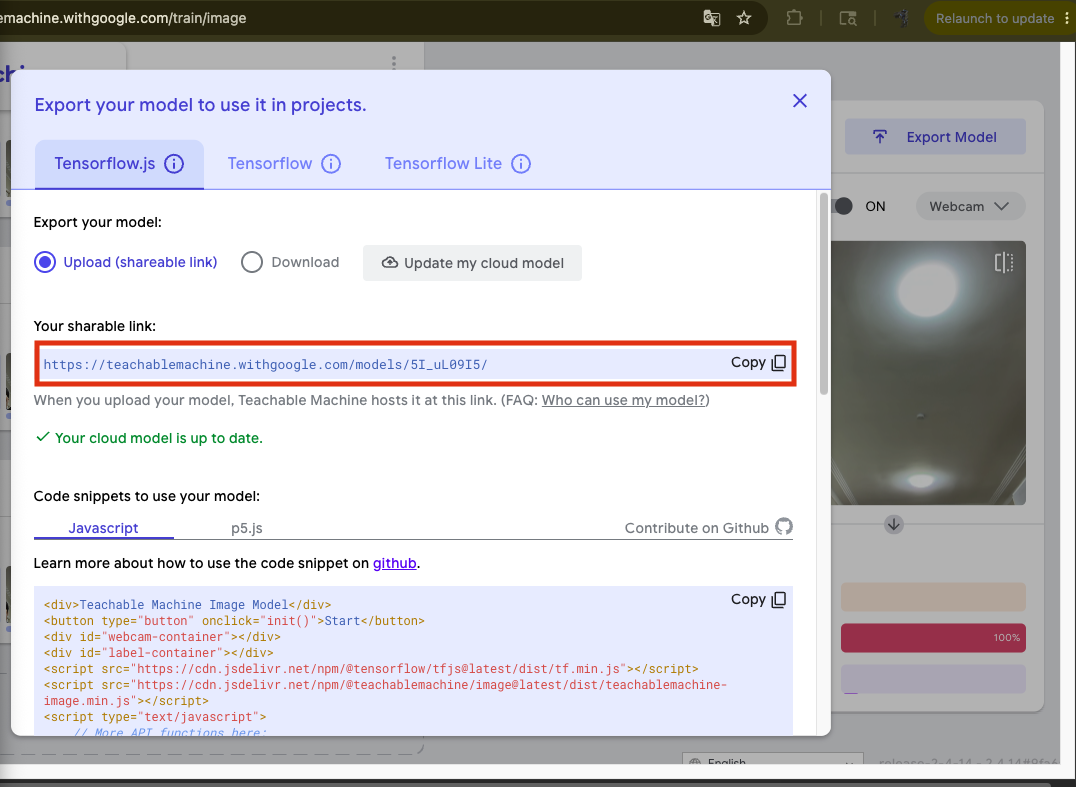
8.
Test the model in the preview.
After checking that it works well, click the Export Model button.

9.
Click “Upload my model.”
The model will be saved to the Google server.
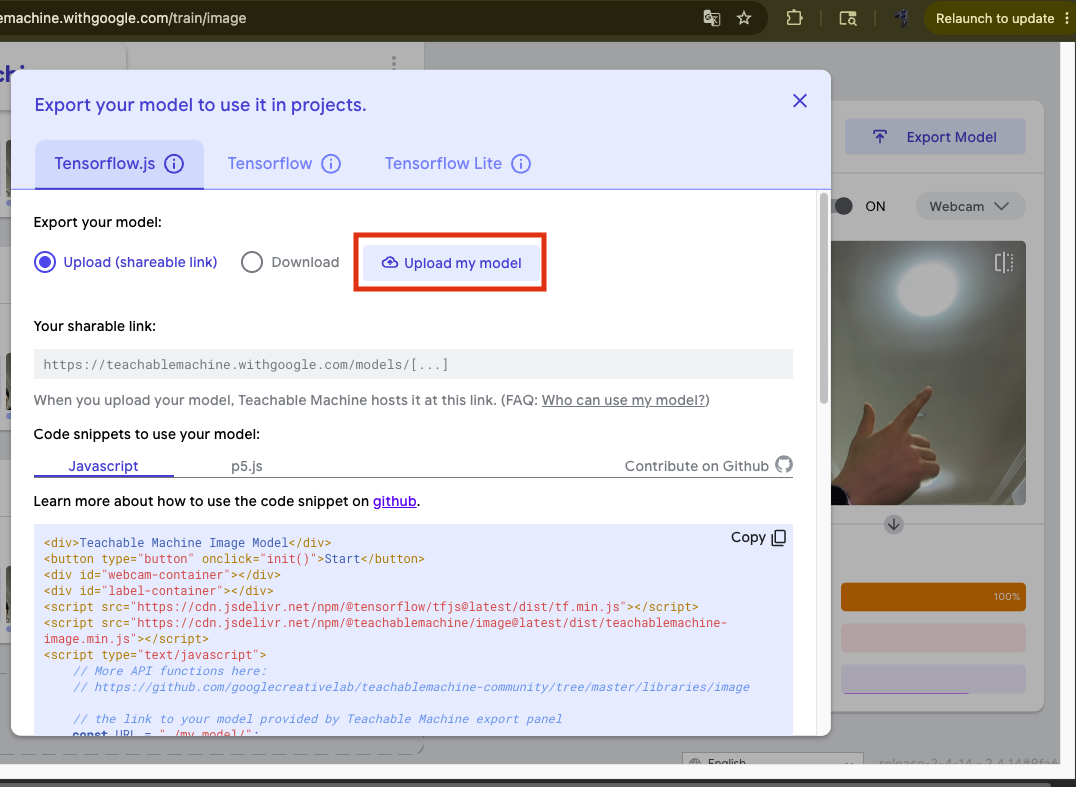
10.
Copy the URL of your model.
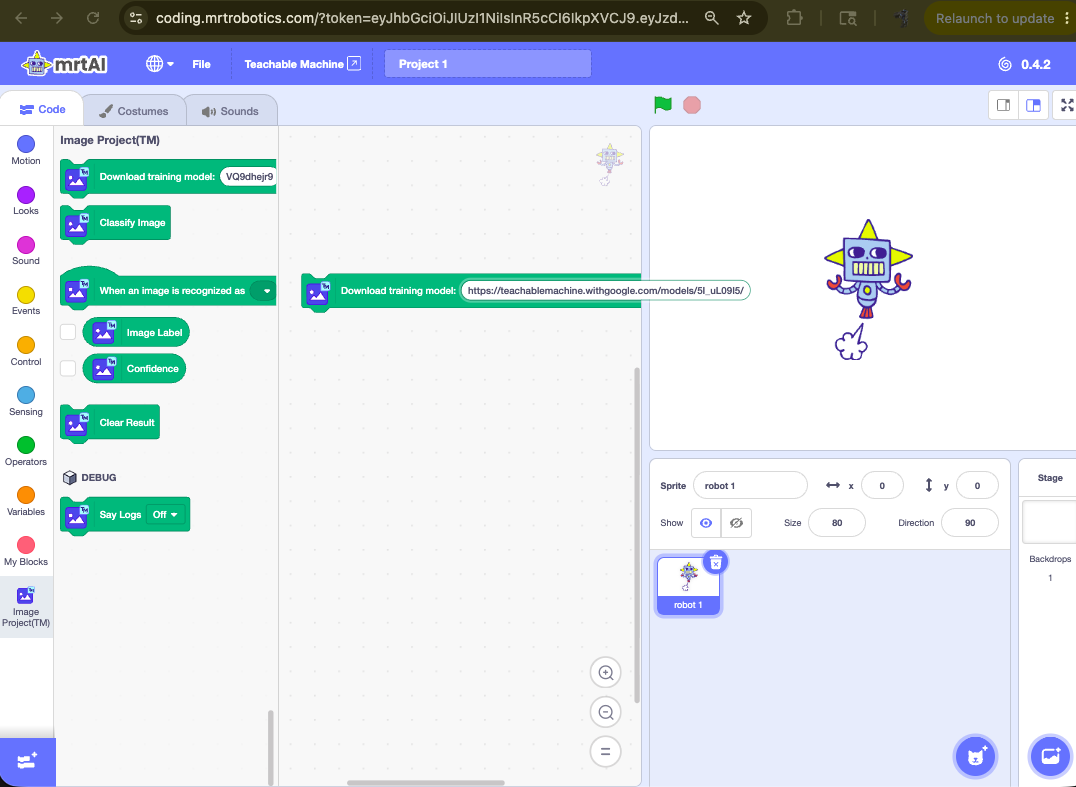
11.
Paste the model URL into your block.
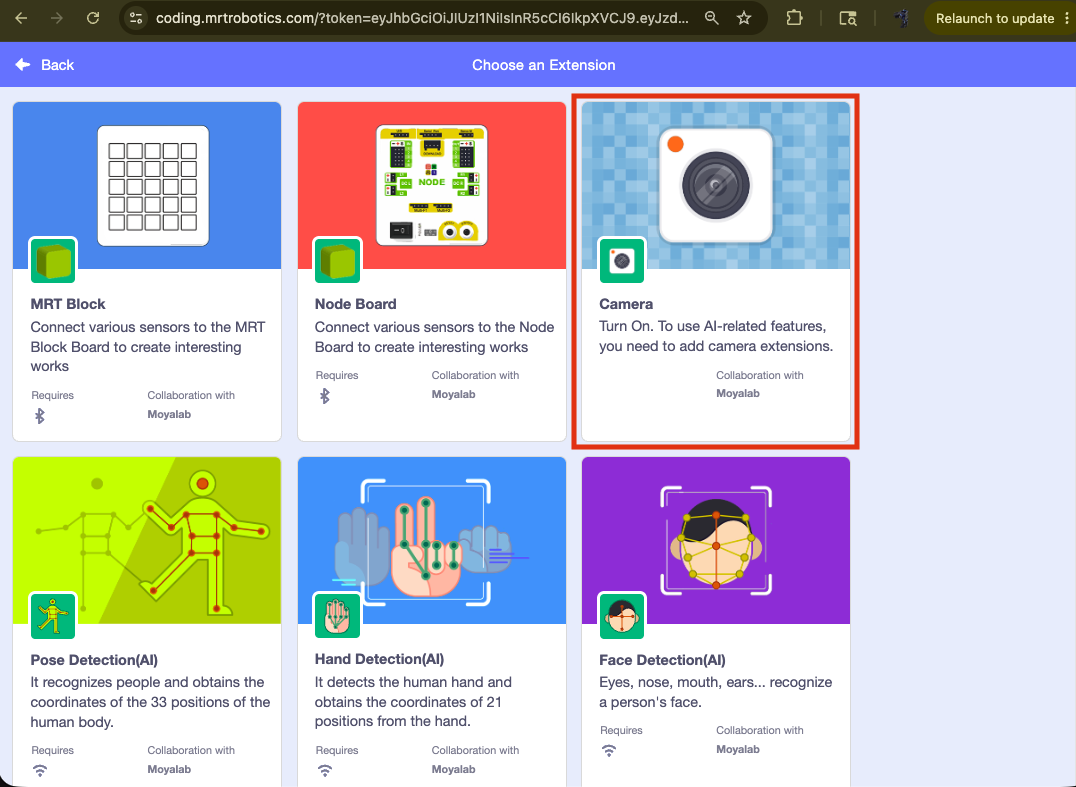
12.
Add the Camera extension.
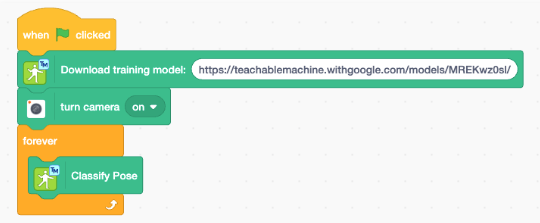
13.
Code it as shown below and connect your machine learning model.
Check whether it works correctly.
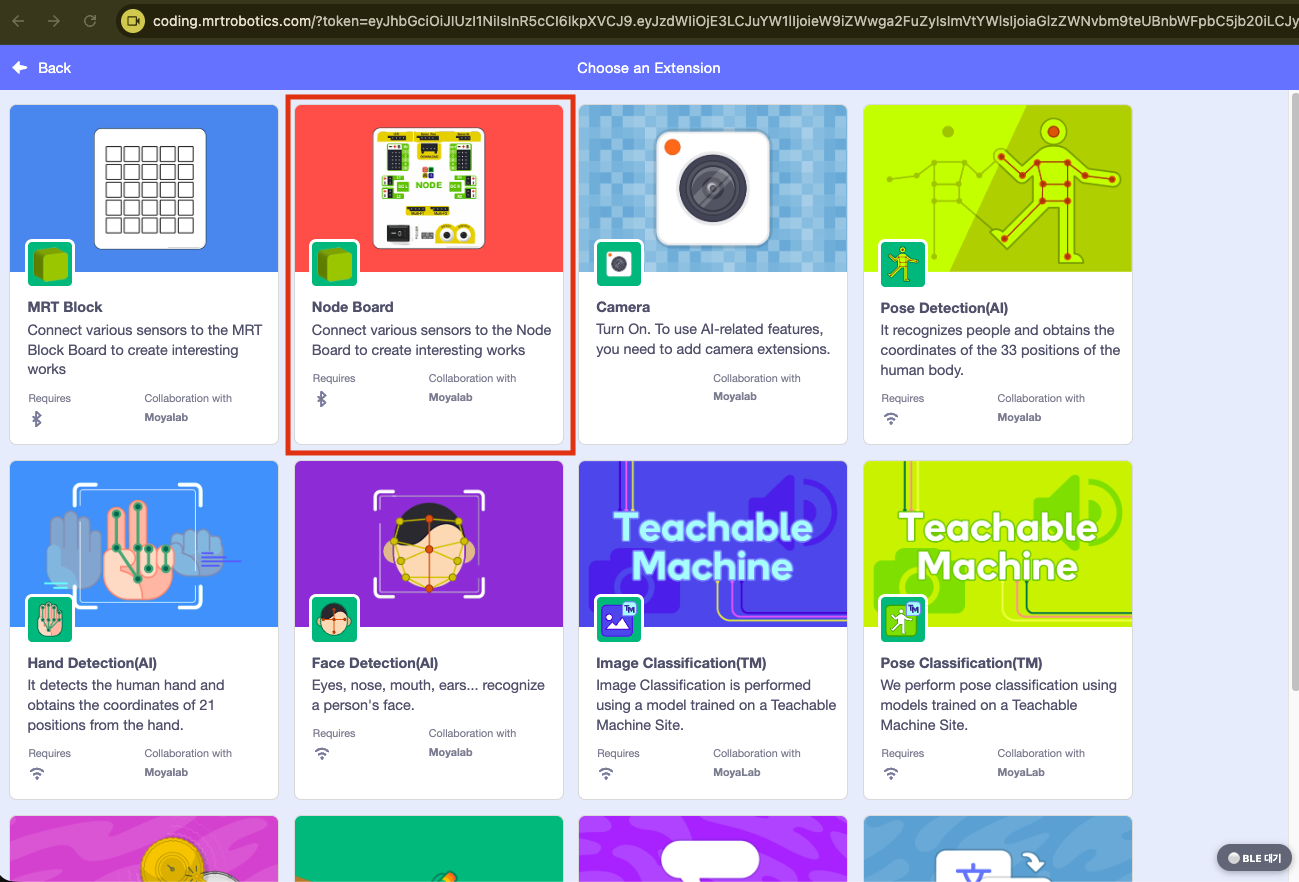
14.
You can control a robot in the same way.
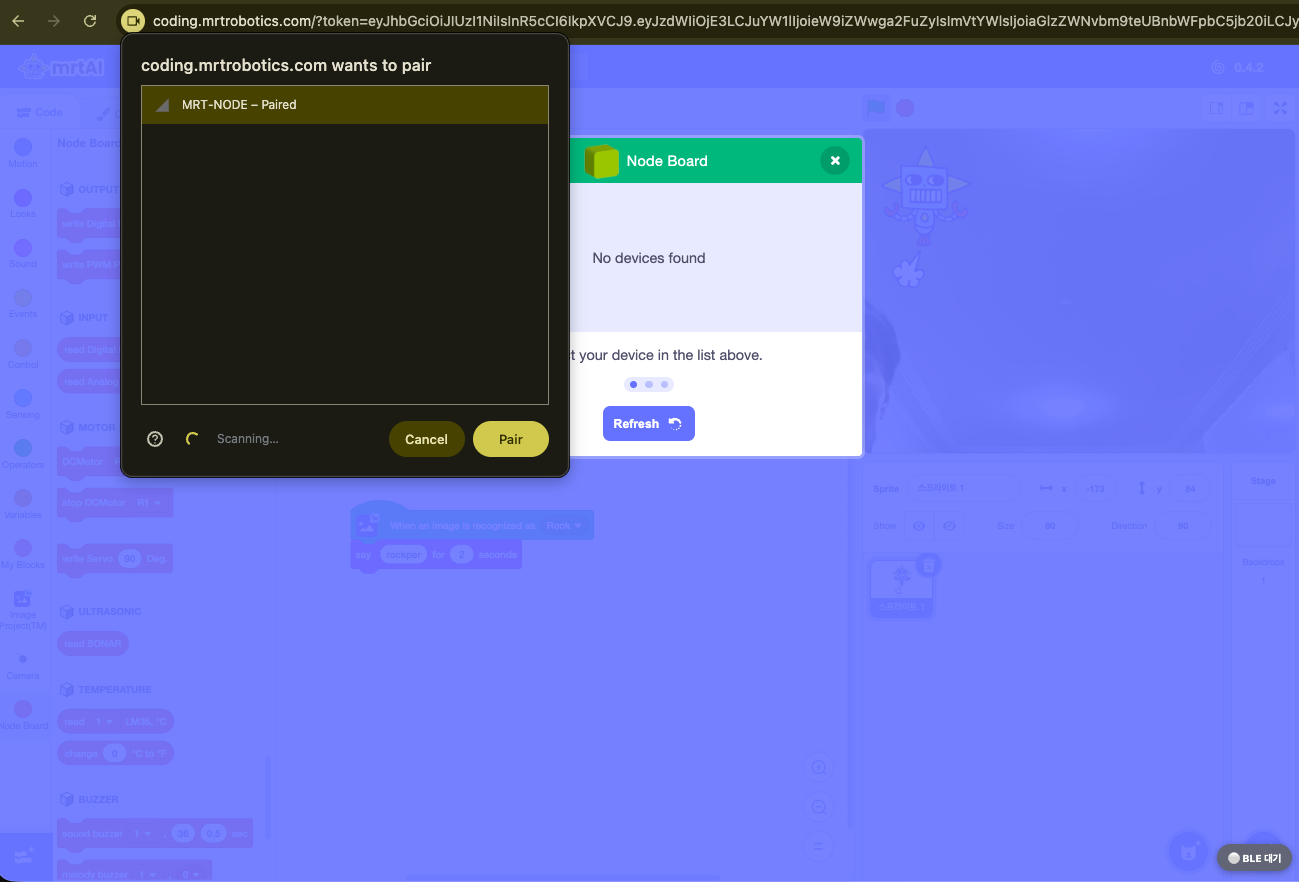
First, add the Node Board.
15.
Select the Node Board.
16.
Now try controlling the robot in the same way.
Because the robot communicates through Bluetooth, there may be a delay of about 0.3 seconds.
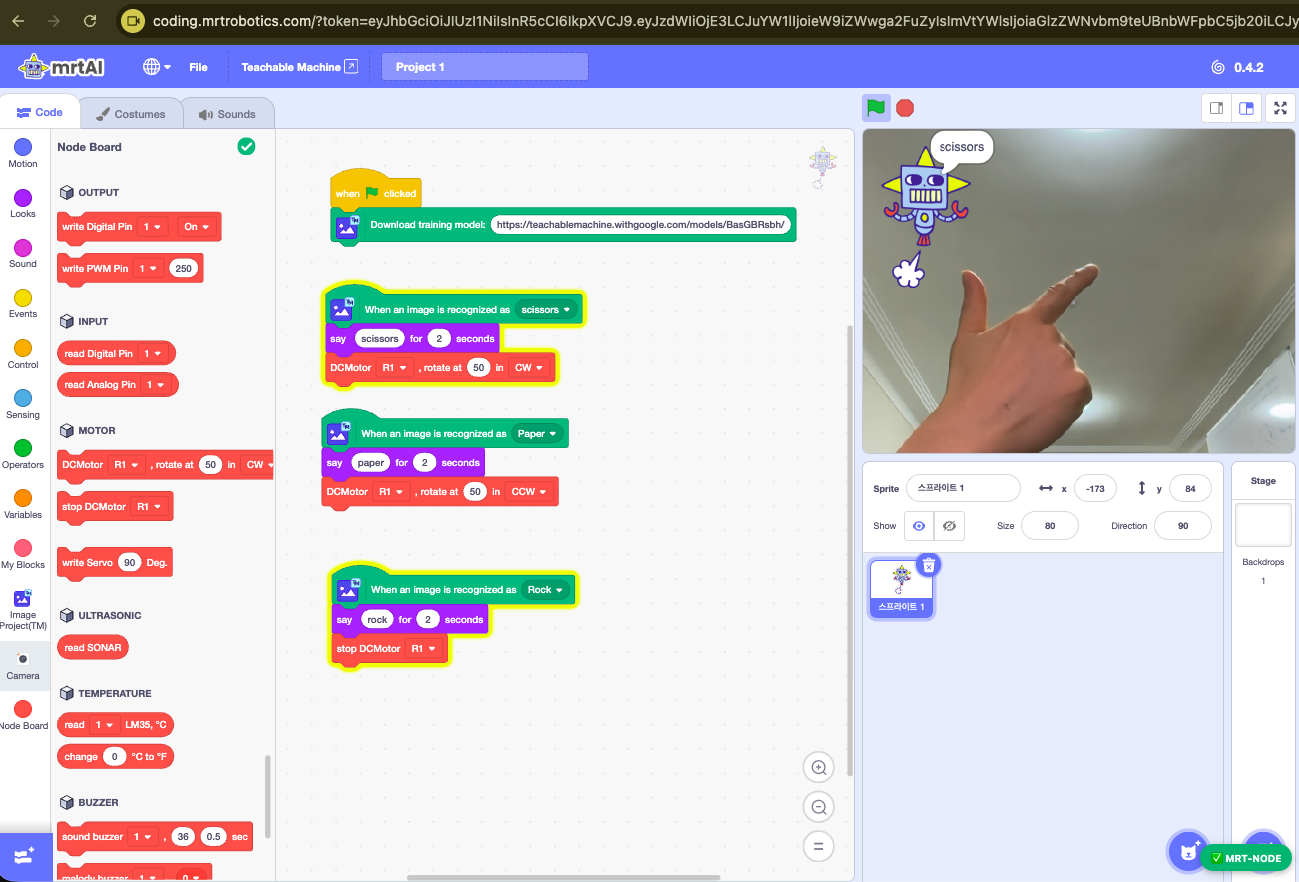
💡 Note: Bluetooth may have a ~0.3 second delay. This is normal.
17. 🧠 Use the Forever Loop to Keep Classifying Poses
To control your game with Teachable Machine, your code must continuously analyse and classify poses in real time.
This is why you must use the forever loop with Classify Pose inside — it keeps the camera running and checking your pose every frame.
The sample code below shows the full game control structure — use this as your starting template:
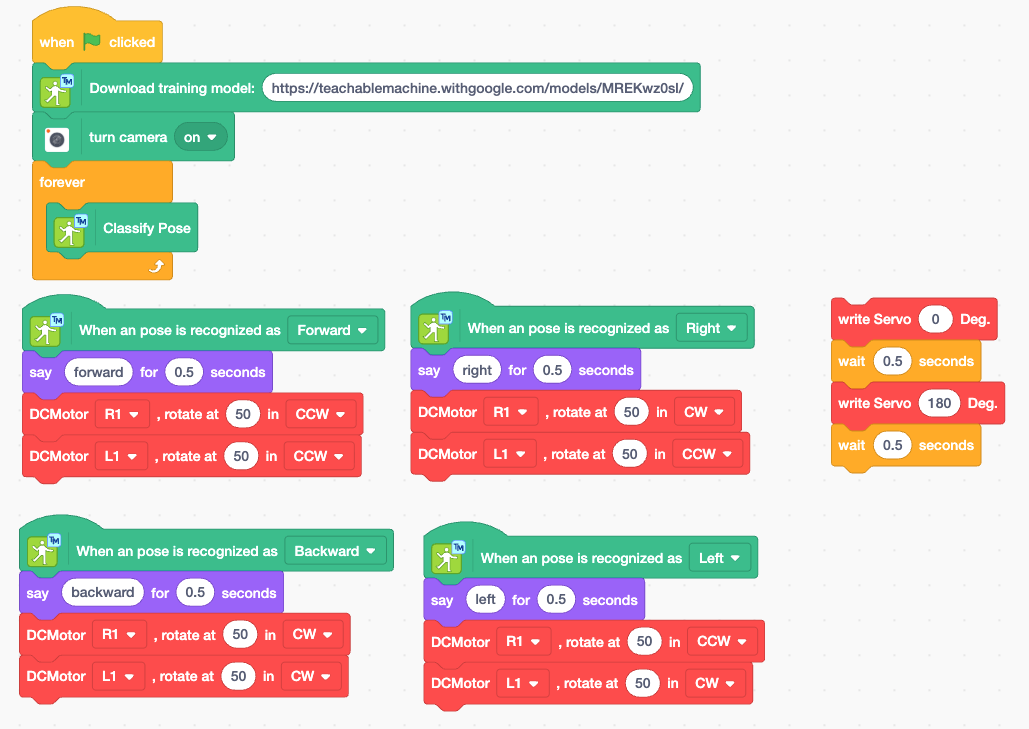
⚠️ Important — You MUST use this loop structure:
📌 Why? The forever loop keeps the camera active and repeatedly runs Classify Pose so your game can react to your body movements instantly.
Without this loop, the pose is only checked once and your game will not respond to pose changes.
18. 🏁 Build Your Own Game & Join the Competition!
Now it’s your turn! Create your own Scratch game controlled by Google Teachable Machine to compete in the challenge.
Use pose recognition to control your game characters or objects — be creative!
🎮 Competition Rules
- Your Teachable Machine model must recognise at least 3 different poses or gestures.
- Your Scratch game must be playable and responsive to pose commands.
- The game must have a clear goal or scoring system.
- Be creative — design something fun and unique!
🔐 Competition Participation Code
Enter this code on the RCC competition site to register your submission:
📦 Submission Requirements
- 🎬 A video link (YouTube or Google Drive) showing your game in action — max 5 minutes
- ✍️ A written description explaining your research and game design — 300+ characters
- 💻 Your Scratch project file or share link from coding.mrtrobotics.com
🎤 Presentation Guide
Your presentation should cover the following points (2–3 minutes):
- 🎮 Game Design — What is your game about? What is the goal?
- 🧠 Teachable Machine Model — What poses/gestures did you train? Why those?
- ⚙️ How it Works — Explain how pose recognition connects to your Scratch game
- 🏁 Gameplay Demo — Show your game being played with pose controls
- 💡 What You Learned — What would you change or improve next time?
Ready to Compete?
Submit your Scratch game and Teachable Machine model at the RCC portal