
Lesson 6 — Connect Your Pose Model to MRT AI Studio
1. Open MRT AI Studio
Open the project you want to control. Use MRT AI Studio rather than regular Scratch because this project needs the Pose Classification extension.
2. Add the Pose Classification Extension
Open the extension library and select the green Pose Classification (TM) extension.
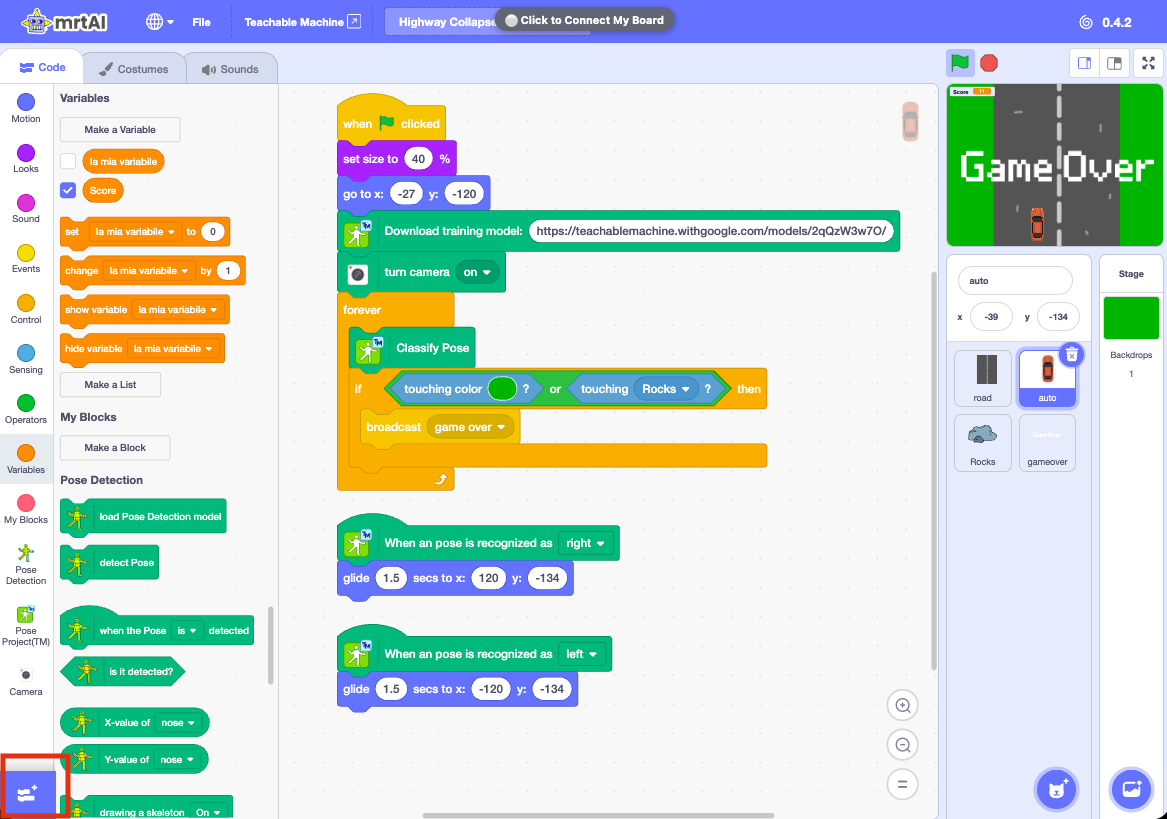
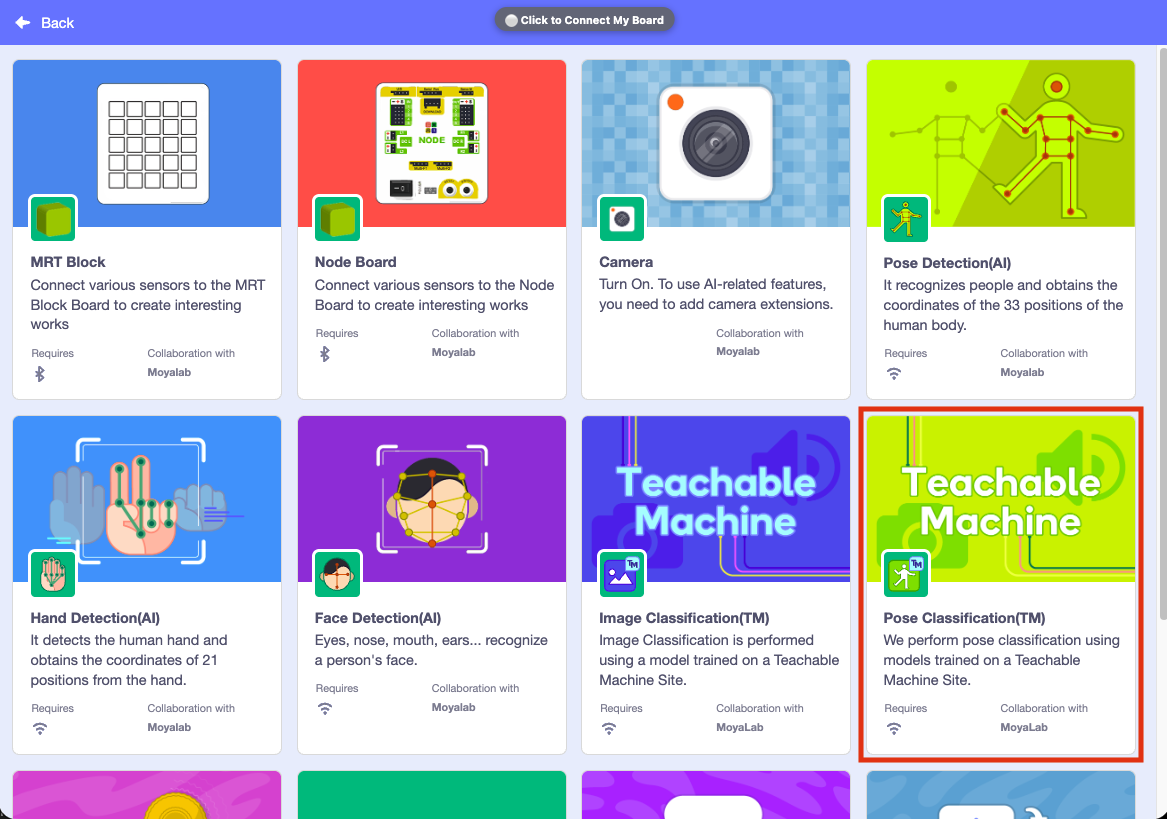
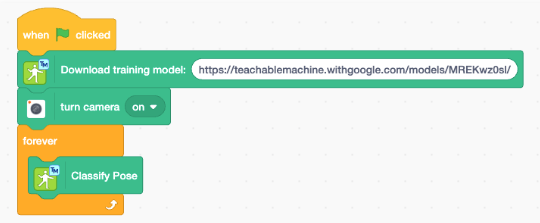
3. Add the Required Start Loop
Paste your Pose Model URL into the download block. Turn the camera on and place Classify Pose inside a forever loop so recognition continues while the player moves.
4. Add One Event Stack for Each Pose
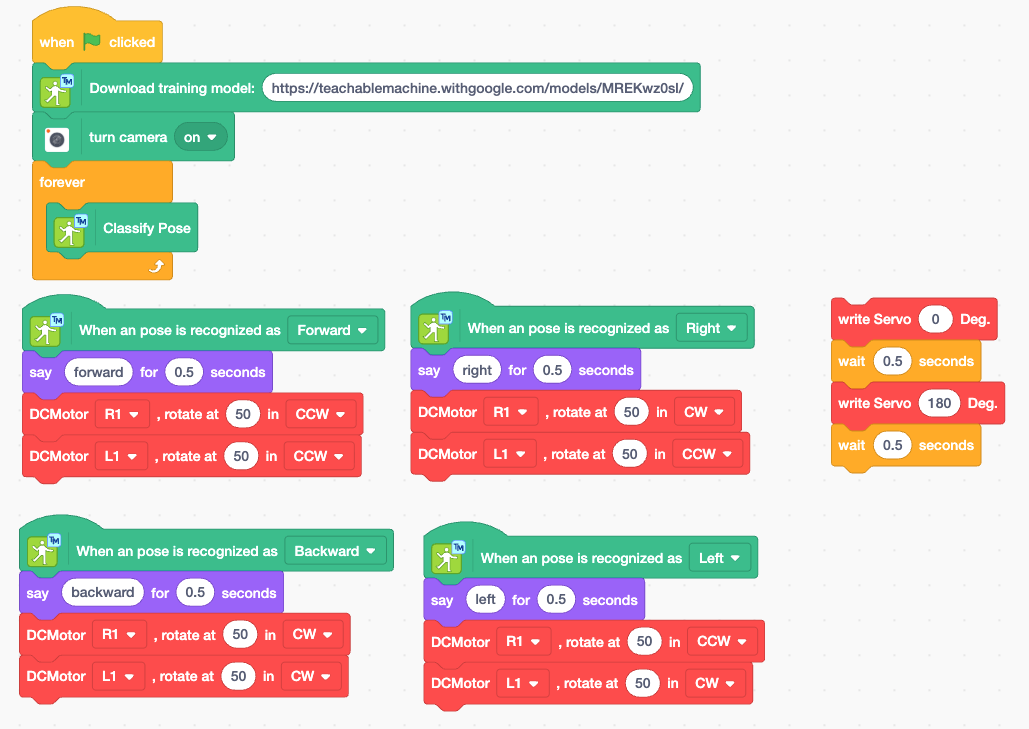
Use one When a pose is recognised as… event for each trained class. Put the game, sound, score or robot action underneath its matching event.
- Coding Challenge: use Motion, Looks, Control, Variables, sound and scoring blocks.
- Robotics Challenge: add the Node Board extension and place motor or servo actions under the Pose events.
5. Test Before Building the Full Game
- Select the green flag and confirm the camera starts.
- Test every pose several times.
- Confirm the correct event runs and other events remain inactive.
- Try another position, distance or player.
- If the result is weak, improve the training data in Teachable Machine, retrain and update the model.
Download your MRT AI Studio project, keep your Pose Model URL, and save the editable Teachable Machine project.
Your Pose Model is now connected and tested. In Lesson 7, you will use this setup to control a complete game and then develop your own competition idea.